
10–25°C: How UK Pros Use Wall Temperature to Avoid Paint Failures
The safe window for exterior painting in the UK sits between 10°C and 25°C, with most oil-based paints tolerating down to around 5°C. Specialist all-weather formulas push that lower still. The number that actually decides success, though, isn’t the air temperature on your phone. It’s the wall itself, plus overnight lows and humidity, which is why so many DIY jobs fail even on a “mild” day.
TL;DR:
Paint should be applied when wall surface temperatures are above 10°C for water-based paints and around 5°C for oil-based formulas, but specialist paints can handle lower temperatures.
Curing, not just drying, is crucial; cold slows chemical curing and can trap moisture, leading to failure, while heat causes rapid surface skinning and brush marks.
DIY painters should thoroughly prepare surfaces, condition paint indoors, apply thinner coats, and avoid painting during high humidity or before frost to prevent failure.
Weather conditions such as rain, dew, strong wind, or direct sunlight can make exterior painting fail regardless of paint type, especially if applied outside manufacturer’s recommended timeframes.
Using tools like infrared thermometers and checking detailed weather forecasts ensure wall temperatures and humidity are suitable, particularly in regions with variable climate like the UK.
Table of Contents
What’s the ideal temperature for exterior painting?
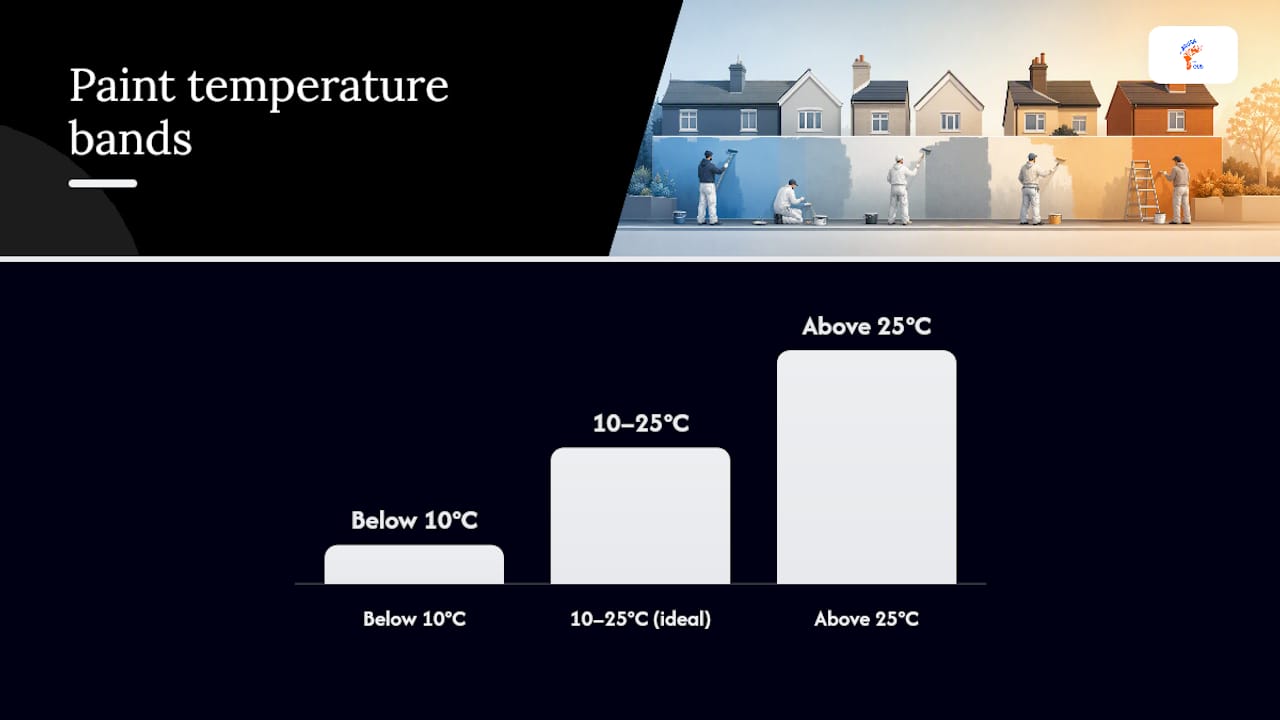
Ten to twenty five degrees Celsius is the range paint manufacturers design around, and it’s a common planning range for exterior painting jobs. Below 10°C, most water-based masonry paints and emulsions struggle to form a proper film. The resins need warmth to coalesce, and if that process stalls halfway, you get a weak, chalky finish that fails within a season. Above 25°C, the opposite problem kicks in: the paint dries too fast on the surface before it’s properly bonded underneath.
There’s a difference between getting away with a single coat on a mild afternoon and giving the paint what it needs for a full chemical cure. A short mild spell can let you apply paint safely, but if the temperature drops sharply that night, the curing process can stall for days, sometimes longer, even though the surface looks dry.
Regional planning matters more in the UK than most guides admit. Cornwall and the wider South West often get a head start on the rest of the country, with useable spring windows opening earlier thanks to milder coastal temperatures, while northern regions and inland Scotland can lag several weeks behind. Time of day matters too:
Late morning to mid afternoon usually offers the most stable temperature and the least dew risk.
Early starts in spring and autumn risk residual overnight moisture on the wall.
Late afternoon starts in summer risk not finishing before the evening temperature drop.
Avoid painting directly after a cold front has passed through, even if the sky has cleared.
How do temperature and humidity affect drying and curing?
Touch dry and fully cured are not the same thing, and confusing the two is where most exterior paint jobs in this country go wrong. A wall can feel dry to a light touch within a few hours, but the paint film underneath may still be chemically converting for days or even weeks. Professionals treat that curing window as the vulnerable period, watching overnight forecasts long after the visible surface looks finished.
Cold conditions slow that chemistry right down. Below the minimum threshold, the paint can trap moisture instead of releasing it, and if frost hits before curing completes, the film can blister or crack outright. Heat causes a different failure. High temperatures make the surface skin over rapidly while the layer beneath is still wet, trapping solvent and leaving brush marks baked into the finish. You also lose working time fast, sometimes down to a few minutes on a hot wall in direct sun.
Statistic to note: the ideal 10°C to 25°C window isn’t arbitrary.
Humidity compounds both problems:
High humidity slows solvent evaporation even when the temperature looks fine on paper.
Damp air combined with a cool evening often produces dew on the wall before the paint has skinned over.
Persistent damp conditions after application are one of the more common causes of mould reappearing through a finished coat.
What’s the minimum temperature for painting outside?
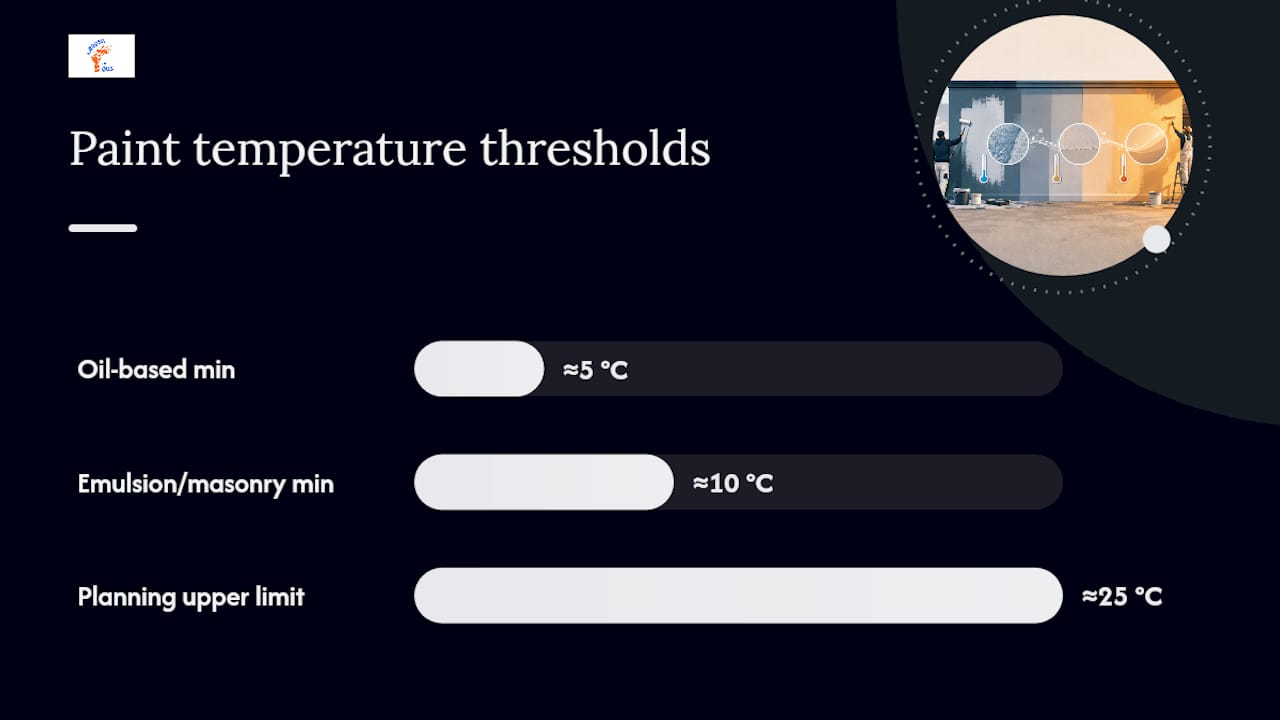
Minimums vary by paint type, and this is where a lot of DIY guides get vague. Standard emulsion and masonry paints generally need the air and surface temperature to stay above roughly 10°C. Oil-based paints are more forgiving, often rated down to around 5°C, though cure times stretch out considerably in the cold. Neither figure is a guarantee; it’s a floor below which failure becomes far more likely.
Specialist products change the equation. Sandtex Trade 365 All Weather is a Pliolite-based masonry paint rated by the manufacturer for application down to around minus 10°C, and it’s built to resist showers shortly after application, useful for the unpredictable South West climate. Zinsser AllWeather is another specialist option, with manufacturer guidance citing application limits around minus 5°C.
A few things to check before assuming either product solves your cold-weather problem:
The manufacturer’s technical data sheet, not the tin’s marketing copy, sets the real minimum.
Both products still demand a genuinely dry substrate; frost or residual damp underneath defeats the low-temperature rating entirely.
Thinner coats and shorter flash-off times between coats are usually specified for cold-weather application, and skipping that step undermines the whole point of buying a specialist paint.
Before starting any job outside the ideal range, checking curing time expectations against the product you’ve bought saves a lot of disappointment later.
How should you prepare and apply paint in marginal weather?
Preparation carries more weight in cold or hot conditions than it does in a perfect 18°C spring week, because there’s less margin for error once the paint goes on.
Clean the surface thoroughly. Pressure washing removes algae, mould and loose material that would otherwise trap moisture under the new coat, and it noticeably extends how long the finish lasts.
Allow proper drying time after washing. Masonry can look dry on the surface within hours but still hold damp deeper in, especially in cooler months, so give it at least a full day where possible.
Bring paint indoors to condition it. Tins left in an unheated shed can thicken or partially separate; resting them at room temperature for a day before use restores flow and cuts brush drag.
Apply thinner coats than you would in summer, with longer gaps between coats to let each one properly flash off.
Choose your tool for the conditions. Brushes and rollers give better control on fiddly detailing, while airless spraying covers large masonry areas faster and more evenly, which matters when a weather window is short.
Pro Tip: Never heat paint directly on a radiator to speed things up. Rapid warming can build pressure inside a sealed tin and change the paint’s consistency unpredictably. Room temperature, given time, is the only safe way to bring it back to workable condition.
If the forecast window is genuinely tight, it’s often more cost-effective to bring in a professional crew who can complete a whole elevation within the available hours rather than stretching a DIY job across several uncertain days. More detail on getting substrates ready is covered in this guide to exterior structure preparation.
When should you avoid painting outside altogether?
Some conditions make failure almost certain, regardless of the paint you’ve chosen. Skip the job entirely if any of the following apply:
Rain is forecast within the manufacturer’s stated rain-free window after application, typically 24 to 48 hours depending on the product.
Overnight temperatures are due to drop near or below the paint’s minimum before curing has had a chance to progress.
Dew is likely to form on the wall before or after painting, which is common on clear, still evenings even when the daytime temperature was fine.
Wind is strong enough to blow dust and debris onto a wet surface or dry the paint unevenly across a wall.
Direct, strong sun is hitting the wall, since it can push the surface temperature well above the air temperature and cause the paint to skin over before it bonds properly.
Short-range forecasts are more useful here than seven-day outlooks, since dew and overnight lows shift quickly and rarely show up clearly that far out.
What tools help you check conditions before you start?
Checking conditions properly takes ten minutes and prevents a wasted weekend. Start with the Met Office’s hourly and multi-day forecasts, which give you the clearest read on overnight lows and short-term rain risk anywhere in the UK, arguably the single most useful free tool for this job.
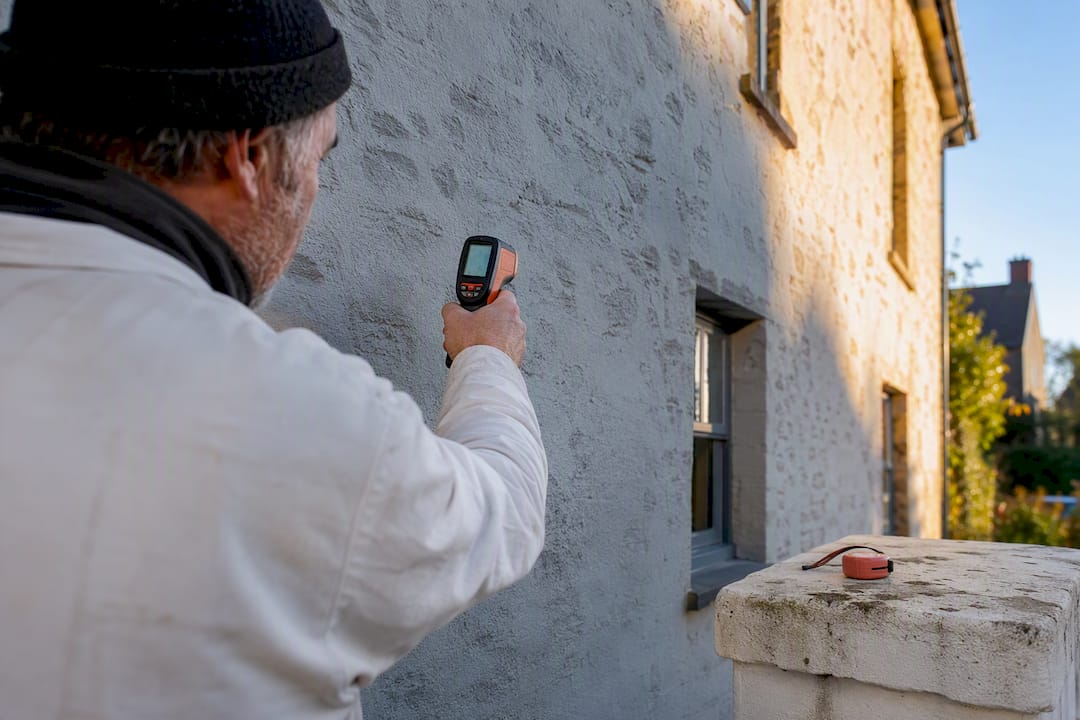
Use an infrared thermometer to check the actual wall surface, not just the air. Masonry can sit several degrees below air temperature after a cold night, and that gap is often the real reason a job goes wrong.
Compare that surface reading against the paint’s stated minimum before you open the tin, not after you’ve already started a section.
Check relative humidity alongside temperature; a warm but very humid morning can behave like a much cooler day for drying purposes.
Recheck the forecast the evening before, since short-range predictions shift more than people expect.
Best months for exterior painting by UK region
Timing your project around the calendar, not just the daily forecast, cuts down on wasted weekends.
Spring, April to June: the most reliable window for most of the country, though watch for heavy pollen settling on wet paint in rural areas and later starts across northern regions than in the South West.
Summer, July and August: workable but demands earlier starts. Paint in the morning or early evening rather than the midday heat, and treat any heatwave forecast as a reason to pause rather than push through.
Early autumn, September: often the last dependable stretch before the wet season sets in properly, particularly useful for the South West, though nights turn damp faster than the daytime temperature suggests.
A fuller regional breakdown, including how coastal exposure changes the picture, sits in this seasonal planning guide for UK exteriors.
Field-tested checks Abrushwithgus relies on
An infrared thermometer is often used to check the actual wall reading against the product’s stated minimum, since walls can read noticeably colder than the air on a still morning. Paint should be brought indoors and left to reach room temperature the day before use, because cold, thickened paint can drag under the brush and lay down unevenly.
On marginal days, coats go on thinner with longer gaps between them, and freshly painted sections get temporary covers if rain looks possible overnight. None of this is complicated. It’s just the difference between a finish that lasts five years and one that needs redoing after one wet winter, and it’s covered in more depth in this South West weather guide.
Key resources worth bookmarking
Check the Met Office for overnight lows, the paint’s technical data sheet for exact limits, and trade guidance on all-weather products before starting.
Ready to get your exterior painted properly this year?
Getting the weather window right is half the battle; getting the application right within it is the other half, and that’s usually where DIY jobs come unstuck. Professional painters often handle both, using surface-temperature checks and Met Office monitoring on exterior jobs in Cornwall and the South West. If you’d rather hand the whole thing over, take a look at the exterior home painting service, or get in touch for a quote before the next good window closes.
Why most exterior painting guides give the wrong confidence
Most advice on this subject treats temperature as a single number pulled off a weather app, and that’s the mistake. Air temperature is a proxy, not the measurement that matters. A wall in shade after a cold night can sit several degrees below whatever your phone says, and that gap is precisely where amateur jobs fail while professional ones don’t.
The conventional wisdom also underrates humidity and overnight lows compared with the daytime high. Homeowners fixate on whether it “feels warm enough” at 2pm and ignore what happens to that wall at 4am the following morning, which is often the point where curing paint actually fails. Manufacturer data sheets exist precisely because generic temperature ranges don’t capture product-specific behaviour, yet most people never open one.
If there’s one change worth making, it’s this: buy or borrow an infrared thermometer before your next exterior job, check the actual wall, and read the technical data sheet for whatever tin you’re using. Both take minutes and prevent the kind of failure that costs a full weekend to fix.
— Angus
Sources
Recommended
Comments