
How to master the residential painting workflow
- WM Creative Designs Limited
- Mar 30
- 8 min read
A well-planned painting workflow is the difference between a finish that turns heads and one that peels within a year. Many homeowners in the South West UK dive straight into painting without a clear sequence, only to discover uneven coverage, visible lap marks, or paint that refuses to adhere properly. Preparation accounts for 70% of a professional paint job, and skipping even one step can undo hours of effort. This guide walks you through every stage, from gathering tools to the final walkthrough, so you get lasting, professional-quality results.
Table of Contents
Key Takeaways
Point | Details |
Preparation is crucial | Proper preparation makes up 70% of a successful residential painting job. |
Follow the right sequence | Always paint ceilings first, then walls, then woodwork, moving top-down. |
Drying and timing matter | Respect recommended drying times and avoid shortcuts for lasting results. |
Invest in quality materials | Using the right paints and tools saves time, money, and hassle in the long run. |
Professional help pays off | Hiring an insured, accredited local painter ensures reliable, high-quality work. |
What you need before starting: Tools, materials, and site prep
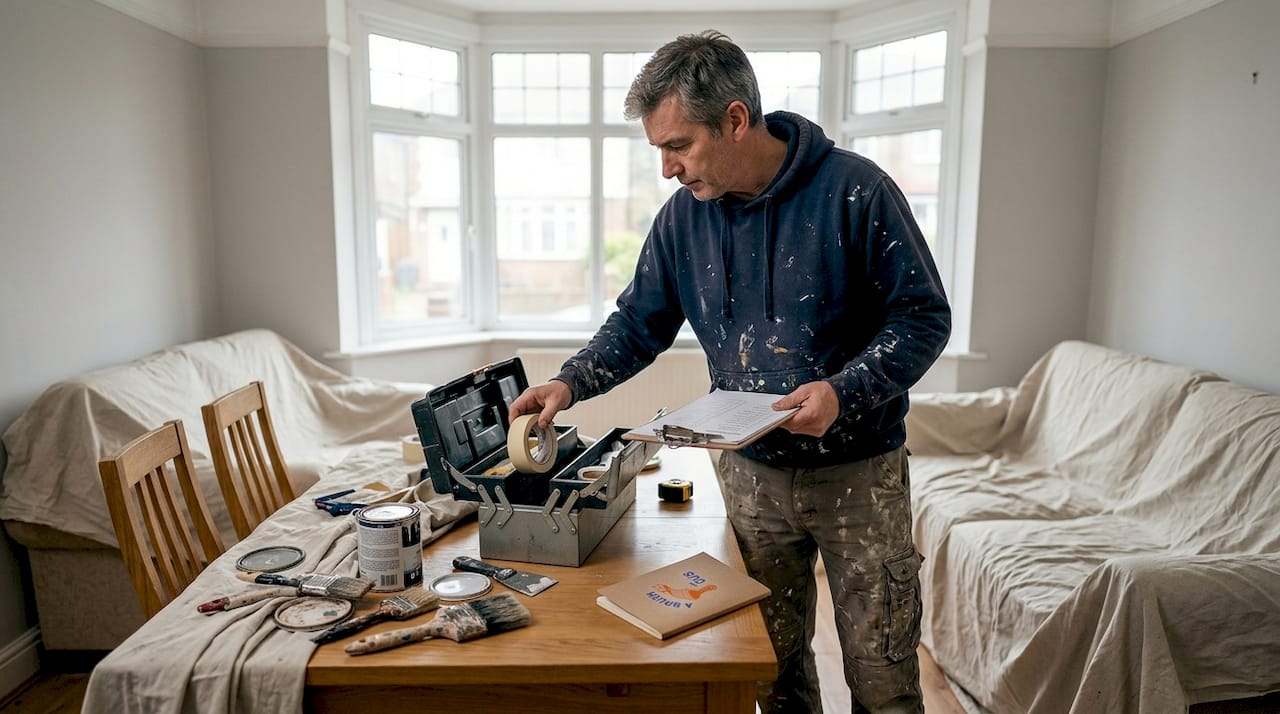
Knowing why workflow matters, let’s start with the tools, materials, and basic checks needed before opening a single tin of paint. Getting this stage right sets the tone for everything that follows.
Preparation makes up 70% of the overall effort in professional painting, so treat it seriously. Rushing through this phase is the single most common reason DIY results disappoint.
Essential tools and materials
Dust sheets and plastic sheeting
Masking tape (low-tack for delicate surfaces)
Filler, sandpaper (80, 120, and 240 grit), and a sanding block
Primer and mist coat materials
Quality brushes (2 inch and 3 inch), rollers (short pile for smooth walls, medium pile for textured), and a roller tray
Paint kettle, stirring sticks, and a paint guard
Ladder or hop-up platform
Ventilation equipment (fans or open windows)
Task | Tool needed | Why it matters |
Filling cracks | Flexible filler + scraper | Prevents cracks reappearing through paint |
Sanding surfaces | Sandpaper + block | Ensures adhesion and smooth finish |
Protecting floors | Dust sheets | Avoids costly clean-up |
Masking edges | Low-tack tape | Keeps lines crisp and clean |
Ventilating the room | Fans or open windows | Speeds drying and reduces fumes |
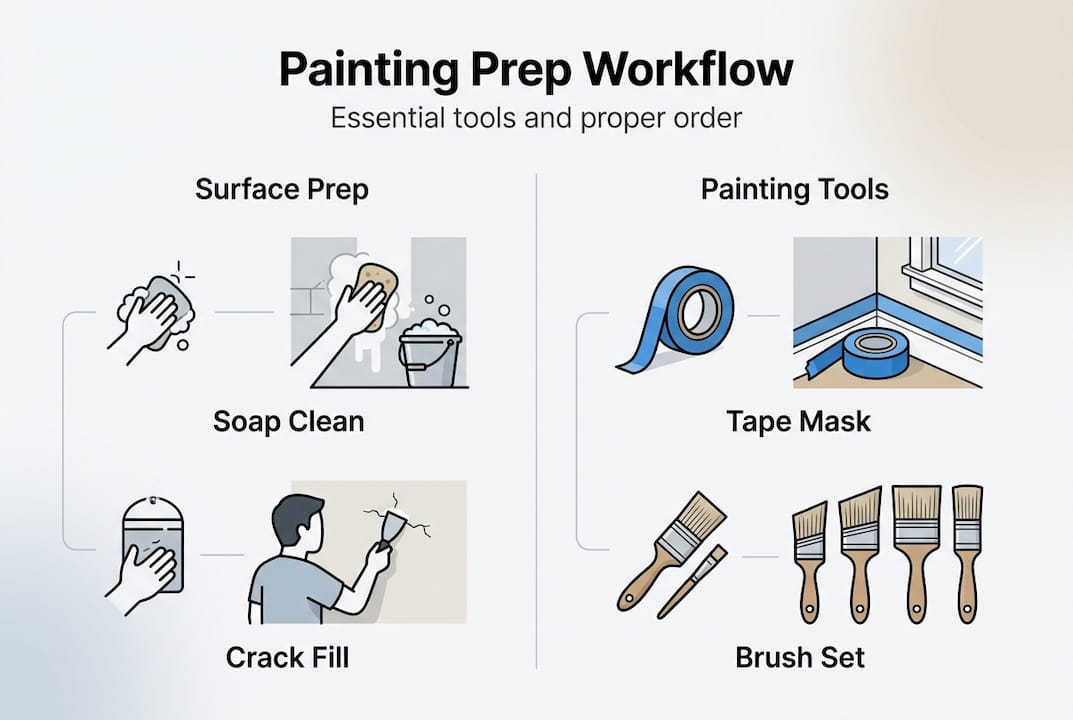
The preparation sequence matters as much as the tools themselves. Start by cleaning all surfaces with sugar soap to remove grease and dirt. Fill any cracks or holes, allow the filler to cure fully, then sand smooth. Protect floors, furniture, and fixtures with dust sheets and masking tape before you even think about opening a tin.
For painting techniques prep, understanding surface condition is critical, especially in older South West UK properties where damp and salt air can affect plaster.
Pro Tip: To test if plaster is dry enough to paint in the South West UK’s often humid climate, tape a small square of plastic sheeting firmly to the wall and leave it for 24 hours. If moisture collects underneath, the plaster needs more drying time. Painting over damp plaster is one of the most expensive mistakes you can make.
Step-by-step interior painting workflow
With everything in place, you’ll want to follow a professional sequence for best results inside your home. Order matters far more than most people realise.
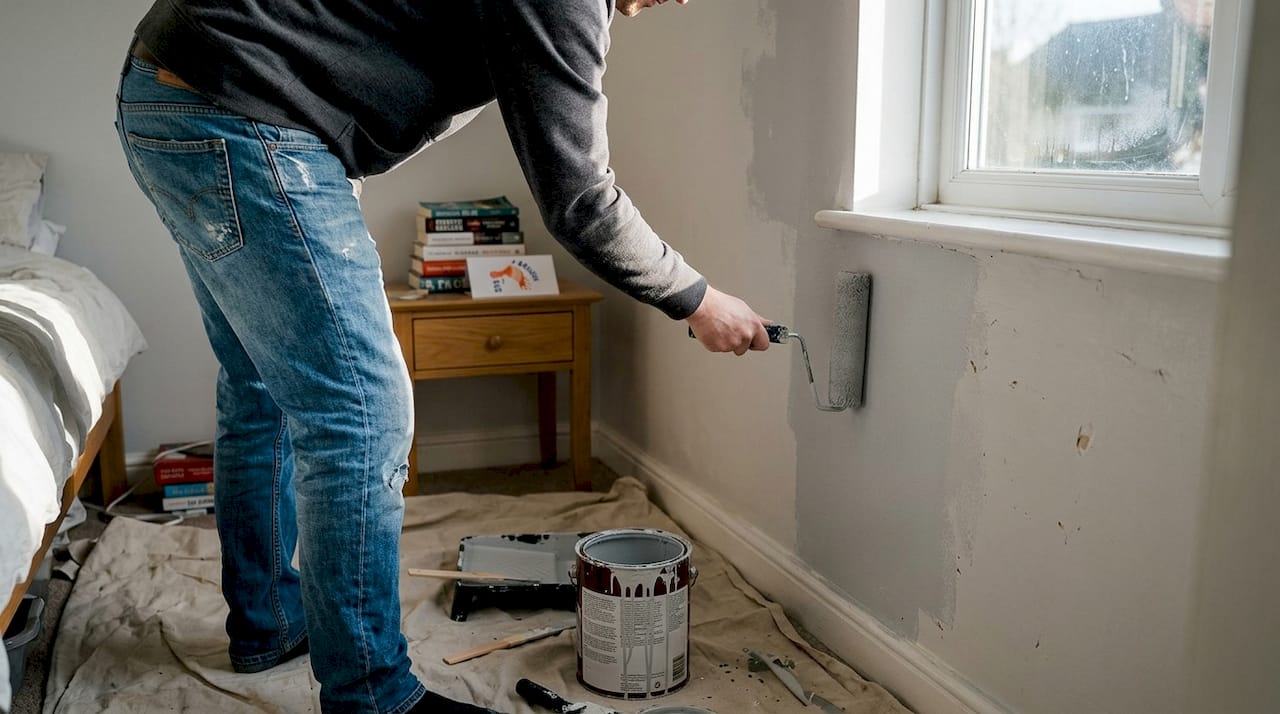
Clear and protect the room. Move furniture to the centre or out entirely. Cover floors and fixed items with dust sheets. Mask skirting boards, window frames, and light switches.
Fill and sand. Apply filler to all cracks, holes, and imperfections. Once dry, sand back to a smooth, flush surface. Wipe down with a damp cloth to remove dust.
Apply a mist coat to new plaster. New plaster is highly absorbent and will suck standard emulsion straight in, leaving a patchy finish. A mist coat ratio of 10 parts water to 1 part paint seals the surface correctly. Allow this to dry fully before proceeding.
Prime bare wood and metal. Any exposed woodwork or metal should receive an appropriate primer before topcoats are applied.
Paint the ceiling first. Pros always paint ceilings first, then walls, then woodwork, working top-down so any drips land on unpainted surfaces.
Cut in around edges. Use a quality brush to cut in a neat border around the ceiling line, corners, and any obstacles before rolling the main field.
Roll walls in a W-pattern. Load the roller evenly and work in a W or M shape to distribute paint without streaks. Always maintain a wet edge to avoid lap marks.
Paint woodwork last. Skirting boards, door frames, and window sills get their topcoats once walls are fully dry.
When choosing interior paints, match the sheen level to the room’s function. Kitchens and bathrooms benefit from a wipeable finish, while living rooms suit a flat or matt emulsion.
For South West UK painting ideas that suit the region’s light and architecture, consider how natural light changes colour perception throughout the day before committing to a shade.
Important: Never use direct heat sources such as fan heaters to speed up drying on new plaster. Rapid drying causes the plaster to crack, which means more filling, more sanding, and more cost. Allow rooms to dry naturally with good ventilation instead.
Pro Tip: Apply thin coats rather than one thick coat. Drying times between coats should be 2 to 4 hours. Thin coats dry faster, adhere better, and produce a far smoother finish than a single heavy application.
The exterior painting process: Dealing with UK weather and surfaces
Moving outside, homeowners must adapt the process for exposures, surfaces, and the unpredictable British weather. The South West’s coastal air and high rainfall make exterior preparation even more critical than in drier regions.
Pressure wash all surfaces. Remove algae, moss, dirt, and loose paint before anything else. Allow surfaces to dry completely, which can take several days after rain.
Repair and fill. Address any cracks, spalling render, or damaged masonry. Use an exterior-grade flexible filler and allow it to cure fully.
Mask and protect. Cover windows, doors, drainpipes, and any surfaces not being painted. Use exterior-grade masking tape that can handle moisture.
Apply primer or stabilising solution. Bare or porous masonry needs a stabilising primer to prevent the topcoat from being absorbed unevenly.
Paint top-down, section by section. Work from the eaves downward, completing one section before moving to the next to maintain a wet edge and avoid visible joins.
Apply two topcoats. Use breathable masonry paint suited to the South West’s damp conditions. Breathable paints allow moisture vapour to escape, preventing blistering and peeling.
For residential painting basics on exterior surfaces, understanding the substrate is essential. Stone, brick, render, and timber all require different preparation and paint systems.
Timing matters enormously. Spring is the safest season for exterior painting in the South West, offering mild temperatures and lower rainfall. That said, year-round painting is possible with the right products. Specialist coatings last up to 20 years, compared to 7 to 10 years for standard masonry paint, making them a worthwhile investment for exposed properties.
Pro Tip: Before painting any exterior surface, press firmly on the wall with your thumb. If powder or loose material comes away, apply a stabilising solution first. Painting over a friable surface guarantees early failure regardless of paint quality.
DIY vs hiring a professional: Costs, risks, and what to expect
Whether you decide to tackle the job yourself or seek help, it’s crucial to understand the trade-offs involved. The numbers tell a clear story.
Factor | DIY | Professional |
Cost (interior, per room) | £50 to £100 materials | £150 to £350 per room |
Cost (semi exterior) | £500 to £1,000 materials | £3,500 to £7,000 |
Time (3-bed home) | 40 to 60 hours | 3 to 5 days |
Insurance cover | None | Public liability required |
Finish quality | Variable | Consistent, guaranteed |
Hidden risks | High | Low |
DIY can save you £1,800 to £3,500 on a full interior repaint, but that saving evaporates quickly if mistakes require professional correction. Poorly prepared surfaces, wrong paint choices, and missed coats are the most common and costly errors.
What to check before hiring a decorator:
Confirm they hold at least £6 million insurance and ask to see the certificate
Check for FMB (Federation of Master Builders) or Which? Trusted Traders accreditation
Ask for references from recent local jobs and, where possible, visit completed work
Get at least three written quotes before committing
Confirm the quote includes preparation, not just painting
For a full breakdown of what professional painting explained involves, and how to compare quotes fairly, it helps to understand exactly what a professional service includes. If budget is a concern, the affordable painting guide for South West UK homeowners covers practical ways to manage costs without sacrificing quality.
Troubleshooting and tips for a flawless finish
With the main work done, maintain standards by tackling minor issues and finishing like a pro. A careful final inspection catches problems before they become permanent.
Final inspection checklist:
Check coverage by viewing walls at a low angle in natural light. Thin patches show up immediately.
Test adhesion by pressing a strip of masking tape firmly to the surface and pulling it away sharply. Paint should not lift.
Inspect all cut-in lines for wobbles or bleeds onto adjacent surfaces.
Look for lap marks, which appear as darker bands where wet paint overlapped dried paint.
Check all woodwork for runs or sags, which are easier to sand back now than after full curing.
Common issues and fixes:
Peeling paint: Usually caused by painting over damp or poorly prepared surfaces. Strip back, address the cause, and repaint from scratch.
Lap marks: Result from allowing paint to dry before the next stroke overlaps it. Maintain a wet edge and work faster in warm conditions.
Premature wear on woodwork: Often means the primer was skipped or the wrong paint type was used. Sand back and apply the correct system.
Storing brushes and rollers sealed between coats in cling film or a sealed bag prevents them drying out and saves significant time and money across a multi-day project.
Pro Tip: For advanced painting tips on achieving a truly flawless finish, lightly sand between coats with 240-grit paper and wipe down with a tack cloth before applying the next coat. This removes any dust nibs and gives each layer the best possible surface to bond to.
Once you’re satisfied with the inspection, remove all masking tape while the final coat is still slightly tacky. Pulling tape from fully dried paint risks lifting the edge and leaving a ragged line.
Get professional help for your next project
If you want to guarantee lasting quality or simply save yourself the hassle, local professionals provide reliable results. Knowing the workflow is one thing. Executing it to a high standard across a full property, in the South West’s variable climate, with the right materials and equipment, is another matter entirely.

At A Brush With Gus, brothers Gus and Rhys bring years of hands-on experience to every project across the South West. Whether you need domestic painting services for a single room refresh or a full exterior home painting transformation, the team handles every stage from preparation to final inspection. For specialist finishes, the professional spraying solutions service delivers a factory-smooth result on surfaces where brushes and rollers simply cannot compete. Get in touch for a no-obligation quote and see what a properly planned, professionally executed paint job looks like.
Frequently asked questions
How long should I wait before painting new plaster?
Allow new plaster to dry for 2 to 4 weeks before painting. Then apply a mist coat at a 10:1 water to paint ratio to seal the surface before any topcoats.
What painting order do professionals use for residential interiors?
Professionals paint ceilings first, then walls, and finally woodwork, always working from top to bottom so drips fall on unpainted surfaces.
How much does professional residential painting cost in the South West UK?
Expect to pay £150 to £350 per room for interior work, or £3,500 to £7,000 for a semi-detached exterior, depending on size, condition, and the complexity of preparation required.
How do I check if walls are ready for painting?
Tape a plastic sheet firmly to the wall and leave it for 24 hours. If no condensation forms underneath, the surface is dry enough to paint safely.
What credentials should a professional painter have?
Look for at least £6 million public liability insurance, plus recognised accreditations such as FMB membership or Which? Trusted Traders status.
Recommended
Comments