
How to prepare surfaces for painting: a homeowner's guide
TL;DR:
Proper surface preparation is essential for paint durability and appearance, with skipping it leading to failure within a few years.
Homeowners should gather all necessary tools and use specific cleaning, sanding, filling, priming, and dust control techniques before painting.
Proper surface preparation is the single factor that determines how long your paint will last and how good it looks. Skipping or rushing prep is the leading cause of paint failure within one to three years. Surface preparation, known in the trade as “substrate preparation,” covers every step between clearing the room and applying the first coat of paint. Get it right, and your finish will look professional for years. Get it wrong, and no amount of expensive paint will save you.
What tools and materials do you need for surface preparation?
The right kit makes every stage of prep faster and more reliable. Gathering everything before you start prevents mid-job trips to the shop and keeps the work moving.
Cleaning agents
Mild washing-up liquid dissolved in warm water removes everyday dust and grime from most interior walls.
A TSP substitute (trisodium phosphate substitute) cuts through grease, nicotine, and kitchen residue without damaging plaster.
White vinegar diluted with water tackles light mildew on bathroom and utility room walls.
Sanding tools
A sanding block with 120-grit paper flattens filler ridges and scuffs glossy surfaces.
220-grit paper on a foam block delivers the fine finish pass immediately before priming.
Professionals hand sand patched drywall with a foam block rather than a power sander to avoid divots and excessive dust.
Fillers and primers
Lightweight spackling compound suits repairs under 6mm deep. Joint compound handles larger imperfections.
Shellac-based primers seal heavy stains and odours. Bonding primers grip glossy or non-porous surfaces. Drywall primers seal new plasterboard before topcoating.
Protective gear and dust control
Safety goggles, an FFP2 dust mask, and nitrile gloves protect you during sanding and chemical cleaning.
Plastic dust sheets, masking tape, and a HEPA-filtered vacuum complete the kit.
Pro Tip: Buy colour-changing spackling compound. It goes on pink and turns white when fully dry, so you never sand too early.
How to prepare surfaces for painting: step by step
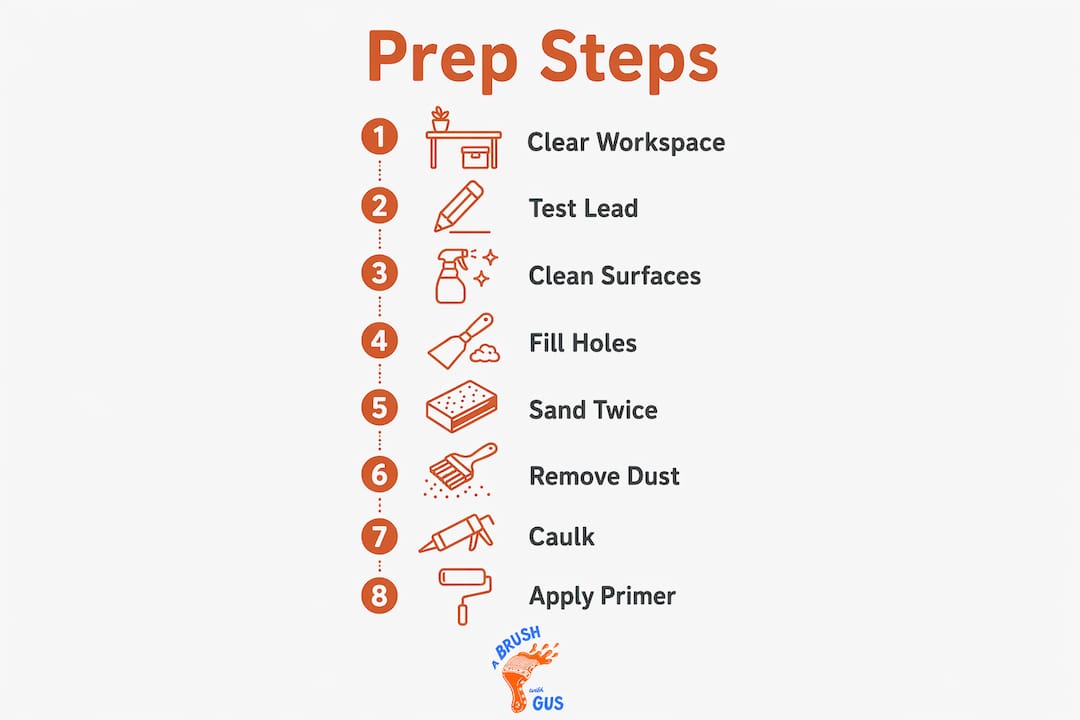
Time spent on surface preparation often exceeds time spent on painting itself in professional quality projects. That ratio surprises most homeowners, but it reflects a simple truth: prep accounts for 50–70% of total project time on a quality paint job. Every minute invested here pays back in a finish that does not peel, crack, or bubble.
Step 1: Clear and protect the workspace
Move furniture to the centre of the room or out entirely. Lay dust sheets over floors and any remaining items. Remove switch plates, socket covers, and curtain fittings. Tape plastic sheeting over doorways to contain dust within the work area.
Step 2: Test for lead paint
Any paint applied before the mid-1980s may contain lead. Lead testing is required before sanding paint that is 40 or more years old. Use a lead test kit from a DIY retailer. If the result is positive, consult a licensed contractor before proceeding. Sanding lead paint without protection creates a serious health hazard.
Step 3: Clean all surfaces
Paint highlights surface flaws rather than hiding them. Contaminants like grease or nicotine cause premature paint failure regardless of paint quality. Wash walls from the bottom up with your chosen cleaning agent, then rinse from the top down. This prevents dirty water from streaking already-clean areas. Allow surfaces to dry completely before moving on.
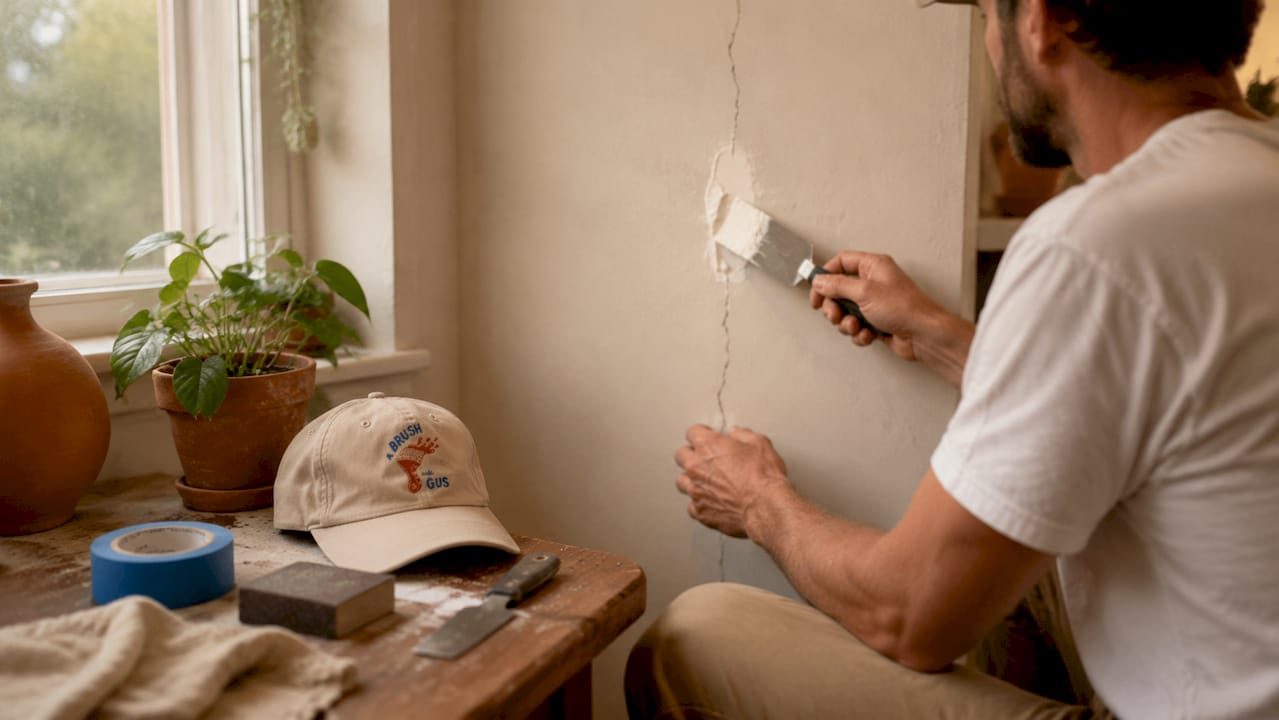
Step 4: Fill holes and cracks
Rake out any loose material from cracks with a scraper before filling. Apply lightweight spackling to small nail holes and minor dents. Overfill each hole by roughly 10% to compensate for shrinkage as the compound dries. For cracks wider than 6mm, use joint compound and apply it in two thin coats, allowing full drying between each. Colour-changing spackling typically dries within 30–60 minutes and shrinks slightly, so that 10% overfill prevents a second application.
Step 5: Sand with a two-pass technique
Professional painters use a two-pass sanding method. Use 120-grit paper first to flatten filler ridges and any raised areas. Follow immediately with 220-grit paper for the finishing pass before priming. Skipping the second pass causes sanding marks to show through the final coat, particularly with satin or eggshell finishes. Always sand with the grain on wood surfaces.
Pro Tip: After sanding, hold a bright torch at a low angle against the wall. This “raking light” technique reveals dents and ridges invisible under normal room lighting. Raking light inspection is the single most effective way to catch hidden flaws before paint goes on.
Step 6: Control and remove dust
Dust left on a surface prevents paint from bonding properly. Use a HEPA-filtered vacuum to remove the bulk of sanding dust from walls, skirting boards, and floors. Follow with a slightly damp cloth to pick up fine particles. For dust control during sanding, place a box fan in a window facing outward. This creates negative air pressure that draws dust outside rather than letting it settle back onto surfaces.
Step 7: Caulk gaps and joints
Run a bead of flexible decorator’s caulk along the joint between walls and skirting boards, around window frames, and at coving joints. Smooth the bead with a damp finger and allow it to cure fully before painting. Caulking seals gaps that would otherwise show as dark lines through the finished paint.
Step 8: Apply the correct primer
Primer selection is one of the most consequential decisions in the entire painting process. Primer types solve specific surface problems, not just colour coverage. Shellac-based primers block heavy stains, smoke damage, and odours. Bonding primers grip glossy or non-porous surfaces where standard primers would peel. Drywall primers seal new plasterboard and prevent the topcoat from soaking in unevenly. Paint and primer in one products are marketing labels, not substitutes for specialist primers on problem surfaces.
Common challenges when prepping surfaces
Even careful homeowners run into problems during prep. Knowing what to expect prevents costly mistakes.
Glossy surfaces: Paint does not bond to a shiny finish without mechanical abrasion. Sanding glossy or semi-gloss surfaces with 120-grit paper dulls the sheen and gives the new coat something to grip. Follow with a bonding primer for best results.
Stubborn stains and odours: Water stains, nicotine, and marker pen bleed through standard primers. A shellac-based primer seals these in a single coat. Applying a standard emulsion over an unsealed stain guarantees the stain reappears within weeks.
Poorly filled areas: Run your hand across filled and sanded areas before priming. Any ridge or hollow you can feel will be visible once paint is applied. Re-fill and re-sand rather than hoping the paint will cover it.
Skipping primer: Skipping primer reduces adhesion and causes early paint failure. This is the most common shortcut taken by homeowners and the one that causes the most callbacks for professional painters.
“Paint is not a filler. It is a finish. Every flaw the surface carries, the paint will carry too.”
How does surface type change your preparation approach?
Different surfaces need different prep strategies. Using the wrong approach wastes time and produces a poor result.
Surface | Key prep steps | Primer type |
New drywall | Sand seams, feather edges, remove dust | Drywall or PVA primer |
Raw wood | Fill knots, sand with grain, remove resin | Oil-based or bonding primer |
Plaster | Gentle sanding, fill cracks, allow full cure | Diluted PVA mist coat first |
Previously painted (matt) | Clean, fill, light sand, dust off | Standard wall primer |
Previously painted (gloss) | Scuff sand with 120-grit, degrease | Bonding primer |
New drywall has a paper face that absorbs paint unevenly without a sealing primer. Raw wood contains resin pockets and grain movement that require an oil-based or bonding primer to prevent bleed-through and peeling. Plaster, particularly older lime plaster, needs a diluted PVA mist coat to reduce suction before any topcoat goes on. Previously painted gloss surfaces are the most commonly mishandled: homeowners skip the scuff sanding step and wonder why the new paint peels within months. For a deeper look at preparing commercial walls, the principles are the same but the scale and materials differ.
Key takeaways
Thorough surface preparation, covering cleaning, filling, sanding, dust removal, and correct primer selection, is the only reliable way to achieve a lasting, professional paint finish.
Point | Details |
Prep takes most of the time | Surface preparation accounts for 50–70% of total project time on a quality paint job. |
Two-pass sanding is non-negotiable | Use 120-grit to flatten, then 220-grit immediately before priming to prevent marks showing through. |
Match primer to the problem | Shellac-based, bonding, and drywall primers each solve different surface issues. Never use paint and primer in one as a substitute. |
Raking light catches hidden flaws | Angle a bright torch along the wall after sanding to reveal dents and ridges before paint goes on. |
Skipping steps causes early failure | Contaminants, missed sanding, and wrong primers are the main causes of paint peeling within one to three years. |
What I have learned from years of prep work
The part of prep that most homeowners underestimate is patience between steps. Filler that looks dry on the surface can still be wet underneath, and painting over it traps moisture that causes the paint to bubble later. I always wait longer than I think I need to, especially in cooler or more humid conditions.
The raking light trick changed how I inspect walls. Under normal lighting, a wall can look perfectly flat. Angle a torch across it and you will see a landscape of ridges, dents, and poorly feathered filler edges. I now do this inspection twice: once after filling and once after the first sanding pass. It adds fifteen minutes and saves hours of rework.
Primer choice is where I see the most expensive mistakes. Homeowners reach for whatever is on the shelf at the DIY shop without thinking about what the surface actually needs. A water stain sealed with a standard primer will bleed through three topcoats. A shellac-based primer stops it in one. The role of prep in painting is not glamorous, but it is where the quality of the final job is decided. Spend the time, choose the right materials, and the painting itself becomes straightforward.
— Angus
When professional preparation makes sense
Some prep jobs are genuinely straightforward for a confident homeowner. Others, particularly those involving large areas of damaged plaster, extensive stain blocking, or exterior surfaces exposed to the South West weather, benefit from experienced hands.

Abrushwithgus offers interior and exterior painting services across the South West, with thorough surface preparation included as standard. For homes where the exterior needs attention, the team handles everything from cleaning and filling to priming and topcoating through their exterior home service. If you want a finish that lasts and a job done without the weekend-long effort, get in touch with Gus and Rhys for a no-obligation quote.
FAQ
Why does surface preparation matter so much?
Paint does not hide surface flaws. It amplifies them. Proper prep creates a clean, solid, dry substrate that gives paint something to bond to and prevents premature peeling.
How long should I wait after filling before sanding?
Colour-changing spackling is typically ready to sand within 30–60 minutes once it turns fully white. Joint compound needs at least 24 hours between coats and before sanding.
Do I always need to use a primer?
A primer is required whenever you are painting new surfaces, covering stains, switching from a dark to a light colour, or painting over a glossy finish. Skipping primer on these surfaces causes adhesion failure and early peeling.
What grit sandpaper should I use on walls?
Use 120-grit paper to flatten filler and scuff existing paint, then follow with 220-grit for the final smoothing pass immediately before priming. This two-pass method prevents sanding marks showing through the topcoat.
How do I stop dust from settling back onto surfaces after sanding?
Place a box fan in a window facing outward to create negative air pressure in the room. Vacuum with a HEPA-filtered machine first, then wipe down with a slightly damp cloth to capture fine particles before priming.
Recommended
Comments