
New homeowner painting advice: 10 steps to get it right

TL;DR:
Proper preparation accounts for up to 60% of an interior painting project and prevents early paint failure.
Painting before move-in offers faster, cleaner results and allows for personalized space from day one.
Good interior decorating starts with preparation, not paint. New homeowner painting advice consistently points to one truth: prep accounts for 40–60% of total project time, and skipping it causes paint to fail within 1–3 years. That figure means the brushwork is almost secondary. Before you choose a colour or open a tin, you need a clear plan covering surface preparation, colour sampling, tool selection, and scheduling. This guide gives you that plan, step by step, so your first home looks exactly the way you pictured it.
1. New homeowner painting advice starts with wall preparation
Wall preparation is the single most important phase of any interior painting project. Professional prep follows an 8-step sequence covering cleaning, patching, sanding, and priming. Skip any step and you risk bubbling, peeling, or cracking paint within a few years.
Start by clearing the room as much as possible. Move furniture to the centre and cover it with dust sheets. Remove pictures, nails, and wall fixings before you do anything else.
Pro Tip: Take photos of your walls before patching so you have a reference for where cables or pipes run behind the plasterboard.
Next, wash the walls. Grease residue is a leading cause of poor paint adhesion, particularly in kitchens and bathrooms. Use TSP substitutes to degrease these surfaces before any paint goes on. In homes where previous occupants smoked indoors, clean every wall in the property, not just the obvious rooms.
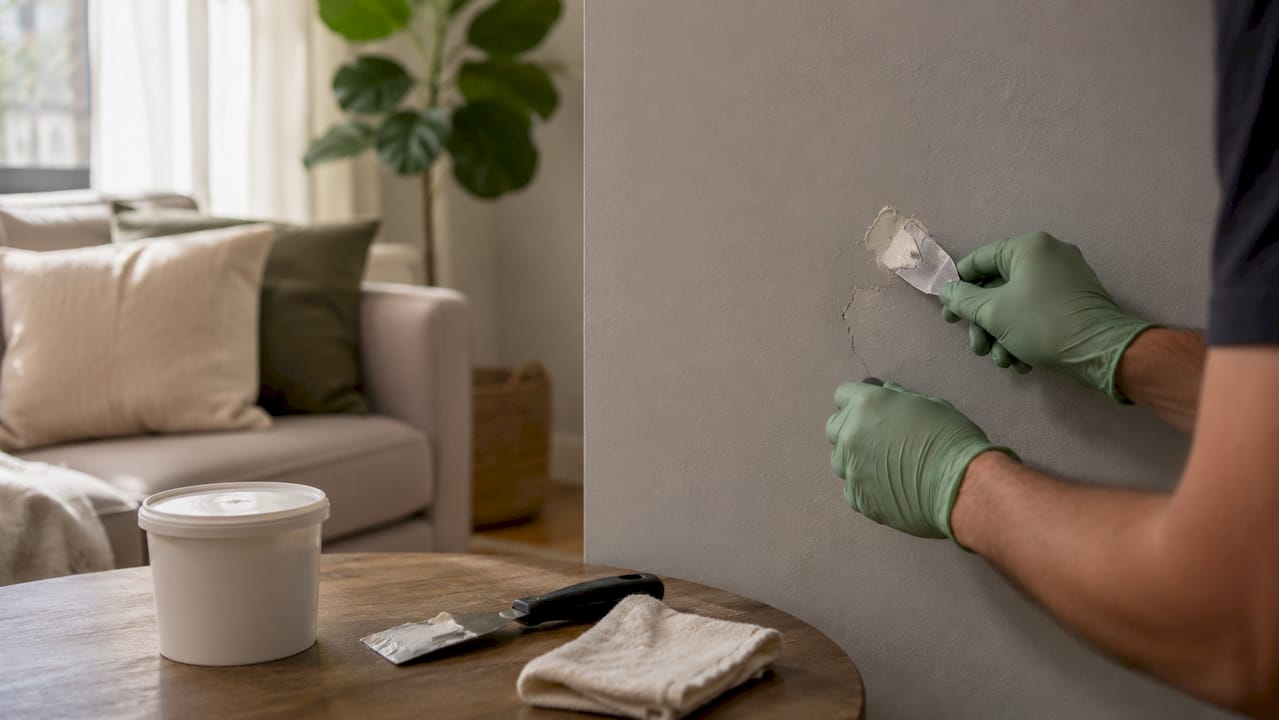
Patch nail holes and cracks with filler, then allow it to dry fully. Most fillers change colour as they dry, giving you a clear visual indicator that the surface is ready. Sand patched areas smooth with 120-grit sandpaper, then lightly sand the entire wall to improve primer adhesion. Caulk gaps around skirting boards, door frames, and window trim for a clean, professional finish.
2. How to choose the best colours for your new home
Colour selection is where most new homeowners make their biggest mistake. They rely on small paint chips from a shop display, which bear almost no resemblance to how a colour looks on a full wall under your specific lighting. The fix is straightforward.
Use 12x12 inch peel-and-stick swatches instead of chips. Mount them directly on the wall and leave them for at least 48 hours. View them in morning light, afternoon light, and under artificial lighting in the evening. A colour that looks warm and inviting at noon can appear cold and flat by 7PM.
Build your colour plan around an anchor strategy:
Main walls: the dominant colour that sets the room’s mood
Trim and ceiling: usually a crisp white or off-white to frame the space
Accent wall or secondary colour: used sparingly to add depth or interest
Consider your fixed finishes before committing. Flooring, worktops, and fitted furniture all affect how a wall colour reads. A warm grey wall looks entirely different next to oak flooring than it does next to slate tiles.
Avoid colours that are heavily trend-driven. Bold statement colours that dominate social media tend to date quickly. Neutral foundations with accent colours in soft furnishings give you flexibility without repainting every two years. For detailed guidance on choosing paint colours, Abrushwithgus has a dedicated resource worth reading before you commit.
Pro Tip: Plan your colour decisions at least two weeks before moving day. Rushed choices made under pressure rarely hold up once you are living in the space.
3. Build your interior painting checklist before buying anything
A written interior painting checklist prevents the most common beginner error: buying supplies on impulse and missing half of what you actually need. Gather everything before you start a single room.
Your core supply list:
Brushes: a 2-inch angled sash brush for cutting in, and a wider brush for trim
Rollers: a 9-inch roller frame with sleeves rated for your paint type (smooth or textured walls)
Painter’s tape: low-tack tape for protecting trim, glass, and sockets
Drop cloths: canvas cloths are more durable than plastic sheeting and do not slip
Primer: essential over patched areas, stained walls, and any colour change from dark to light
Spackle and filler: for holes, cracks, and dents
Sanding tools: a sanding block and 120-grit paper for prep, 220-grit for finishing
Quality matters more than quantity. A cheap roller leaves fibres in the paint and a textured finish you did not want. Spend more on a good roller sleeve and you will spend less time fixing the result. Abrushwithgus recommends checking the essential tools guide for a full breakdown of what to buy and why.
Pro Tip: Remove socket covers and light switch plates before you start. Painting around them takes three times as long and never looks as clean.
4. Master the technique: cutting in, rolling, and wet edges
Technique separates a patchy finish from a professional one. The correct order is always ceiling first, then walls, then trim and skirting. Working top to bottom means drips land on unpainted surfaces.
Cut in first. Use your angled brush to paint a 2-inch band along all edges: ceiling line, corners, and where walls meet trim. Do not let this dry before rolling the main wall area. Keeping a wet edge prevents lap marks, which are the visible lines that appear when paint dries before the next section is applied.
Roll in a “W” or “M” pattern across the wall, then fill in without lifting the roller. Apply light, even pressure. Two thin coats always outperform one thick coat. A thick coat sags, takes longer to dry, and often shows brush marks.
Trim and doors deserve their own session. Use a semi-gloss or gloss finish on woodwork as it is more durable and easier to wipe clean than matt paint. For professional wall results, the technique matters as much as the product.
Ventilate the room properly while painting. Open windows and use a fan to move air through the space. This reduces fume build-up and speeds up drying time between coats.
5. Plan the logistics before the first tin is opened
Logistical planning is the most overlooked part of any painting project. Room sequencing and clear communication with painters or helpers directly affects how smoothly the work goes and how satisfied you feel at the end.
Decide which rooms to paint first based on daily priorities. Bedrooms and bathrooms are typically most urgent. Living rooms and kitchens can follow once the essentials are done.
Key logistics to sort before you start:
Arrange for pets and children to be out of the space during painting days
Move valuables and breakables out of every room being painted
Confirm paint delivery dates so you are not waiting on supplies mid-project
Agree a clear start time with any helpers or professional painters
Schedule professional painters at least 5–7 business days before your intended start date. Good decorators book up quickly, particularly around popular moving periods in spring and autumn. Leaving this too late is the most common reason projects get pushed back past move-in day.
The ideal window for painting is the 2–4 week period after you take ownership but before you move furniture in. Empty rooms are faster to paint, easier to prep, and far less disruptive to daily life. Abrushwithgus covers project planning in depth for homeowners who want a structured approach.
6. Prioritise trim, doors, ceilings, and cabinets early
Walls get all the attention, but trim, doors, and ceilings often show age and wear more visibly. Painting trim before move-in avoids the awkward process of masking furniture and working around belongings later.
Fresh trim can make an older home feel completely renewed. Scuffed skirting boards and yellowed door frames undermine even the most carefully chosen wall colour. Address these surfaces first and the room reads as finished rather than patched together.
Ceilings are worth painting if they show staining, water marks, or a yellowed tone from age or smoking. A single coat of ceiling white lifts the entire room and removes any stale visual residue from previous occupants.
Cabinet refinishing is a cost-effective way to update a kitchen without a full remodel. Proper surface preparation for woodwork means degreasing, light sanding, and using a specialist primer before any topcoat. Skipping the primer on cabinets is the most common reason the finish chips within months.
Surface | Best time to paint | Finish type |
Walls | Before move-in | Matt or eggshell |
Trim and skirting | Before move-in | Satin or semi-gloss |
Ceilings | Before move-in | Flat ceiling white |
Doors | Before move-in | Satin or gloss |
Kitchen cabinets | Before move-in | Specialist cabinet paint |
7. Use primer correctly or repaint sooner than you planned
Primer is not optional. Skipping primer causes paint to fail within 1–3 years, particularly over patched areas, stained surfaces, and any wall where you are painting a lighter colour over a darker one. That is an avoidable cost and an avoidable headache.
Use a dedicated primer rather than a paint-and-primer-in-one product when the surface has been patched, stained, or not previously painted. Paint-and-primer combinations work well on already-painted walls in good condition. They are not a substitute for proper priming on problem surfaces.
Allow primer to dry fully before applying your topcoat. Rushing this step causes the topcoat to pull away from the surface or dry unevenly. Check the manufacturer’s drying time and add an hour in humid conditions. For a detailed look at the role of prep, Abrushwithgus has a homeowner-focused guide that covers this in full.
8. Painting before move-in gives you a clean reset
Repainting before you move in is the single biggest advantage a new homeowner has. Empty rooms offer full access to every wall, corner, and surface without the need to work around sofas, beds, or kitchen appliances. The result is a cleaner finish in less time.
There is also a psychological benefit. Moving into a home that already reflects your taste and colour choices feels entirely different from moving into someone else’s decorating decisions. The space feels yours from day one.
Painting after furniture arrives is not impossible, but it is slower, messier, and more likely to result in missed patches and paint on belongings. If you have the window before move-in, use it. The value of repainting early extends beyond aesthetics to long-term satisfaction with your home.
Key takeaways
Thorough preparation, not paint quality alone, determines how long and how well your interior finish lasts.
Point | Details |
Prep dominates project success | Wall preparation accounts for 40–60% of total project time and prevents early paint failure. |
Test colours properly | Use 12x12 inch peel-and-stick swatches for 48 hours before committing to any colour. |
Book painters early | Schedule professional decorators at least 5–7 business days before your target start date. |
Prime every problem surface | Always use primer over patches, stains, and colour changes to avoid repainting within 1–3 years. |
Paint before you move in | Empty rooms produce faster, cleaner results and let you personalise the space from day one. |
What I have learned after years of painting new homes
The homeowners who are happiest with their results are almost never the ones who spent the most on paint. They are the ones who spent the most time preparing. I have walked into rooms where someone bought premium paint, applied it straight onto dusty, unpatched walls, and wondered why it looked worse than the old coat they painted over.
Colour decisions made in a hurry are the other consistent regret I see. People pick a colour in the shop under fluorescent lighting, get home, and find it looks nothing like they expected. The 48-hour swatch test is not a nice extra. It is the difference between loving a room and repainting it six months later.
My honest advice: treat the prep as the project. The painting itself is the easy part. Get the walls clean, patched, sanded, and primed properly, and almost any decent paint will look good. Rush the prep and no amount of expensive paint will save the finish.
One more thing. If you are working with professional painters, communicate clearly about the sequence of rooms, your colour choices, and your move-in date. Good decorators plan around your schedule, but only if you give them the information they need in advance.
— Angus
Professional painting for new homeowners in the South West
Getting the prep right, choosing colours with confidence, and finishing every surface to a high standard takes time and experience. If you would rather spend your first weeks in your new home enjoying it rather than painting it, Abrushwithgus is here to help.

As a family-run decorating business serving the South West, Abrushwithgus handles everything from surface preparation and priming through to the final coat on walls, trim, ceilings, and cabinets. The team works around your move-in schedule and brings the expertise to get it right first time. Explore the full range of domestic painting services and get in touch to discuss your project. Booking early gives you the best chance of having your home ready before moving day.
FAQ
How much of a painting project is preparation?
Preparation accounts for 40–60% of total project time on a quality paint job. Skipping prep steps is the leading cause of paint failure within 1–3 years.
How far in advance should I book a painter for my new home?
Book at least 5–7 business days before your intended start date. Good decorators fill their schedules quickly, particularly around peak moving periods in spring and autumn.
What is the best way to test paint colours before committing?
Use 12x12 inch peel-and-stick swatches mounted directly on the wall. Leave them for 48 hours and view them in different lighting conditions before making a final decision.
Do I really need primer if I am using a good quality paint?
Yes, particularly over patched areas, stained walls, and any surface where you are painting a lighter colour over a darker one. Paint-and-primer combinations do not replace dedicated primer on problem surfaces.
Is it better to paint before or after moving furniture in?
Painting before you move in gives you full access to every surface, produces a cleaner finish, and takes less time. It is the most practical window a new homeowner has.
Recommended
Comments