
How to use sandpaper on walls before painting
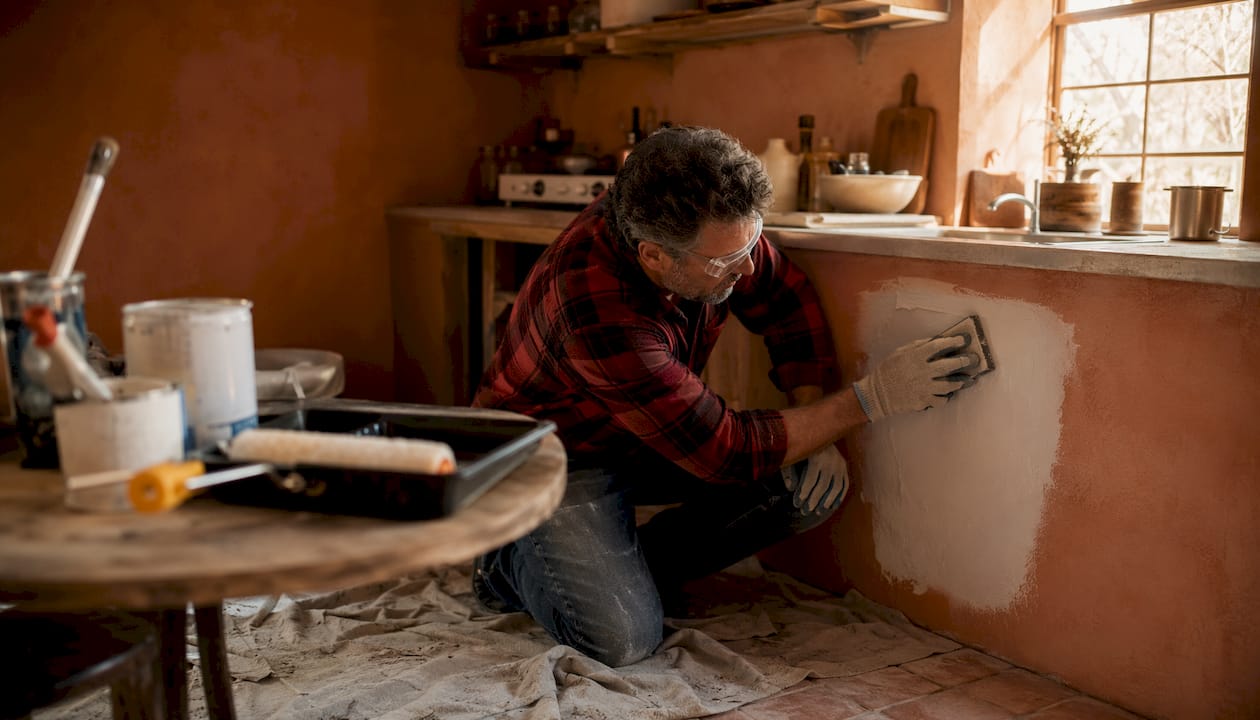
Yes, you should sand walls before painting in most cases. Sand every filled repair, scuff any glossy or semi-gloss surface, and clean the wall before you pick up a brush. Skip those steps and you are likely looking at peeling, blotchy patches, or a finish that fails within a year.
The quick version:
Sand filled repairs with medium grit sandpaper to level the patch, then finish with finer grit to blend the edges
Scuff glossy surfaces with Use sandpaper fine enough to dull the glossy surface so the new paint has something to grip
Clean first with sugar soap on greasy or dusty walls; sanding a dirty wall grinds grime into the surface rather than removing it
Vacuum and tack after sanding, then spot-prime bare or patched areas before applying your topcoat
Not sure whether to DIY? Abrushwithgus covers sanding and full preparation for homeowners across Cornwall and the South West
Table of Contents
Why does sanding walls before painting actually matter?
Paint needs something to grip. On a smooth or glossy surface, the binder in your paint has almost nothing to bond to, so it sits on top rather than keying in. Professional decorators treat sanding as creating a microscopic texture, a ‘key’, that lets the new coat bind securely. Without it, paint can fail prematurely, especially on semi-gloss or oil-based finishes.
Sanding is non-optional in four situations: filled repairs (the filler surface is too smooth for paint to grip), glossy or semi-gloss existing paint, visible texture from old roller marks or brush strokes, and any area with flaking or peeling paint. On a sound, flat, matt-painted wall that is clean and undamaged, a thorough wash with sugar soap may be all you need before recoating.
The table below shows when each preparation method makes sense:
Situation | Sand | Chemical deglosser | Clean only |
Filled repairs | ✓ Required | Not suitable | Not sufficient |
Glossy/semi-gloss paint | ✓ Best result | ✓ Good for trim | Not sufficient |
Flat matt paint, sound condition | Optional scuff | Not needed | ✓ Sufficient |
Flaking or peeling paint | ✓ Required | Not suitable | Not sufficient |
Detailed trim or mouldings | Optional | ✓ Less dust | Not sufficient |
A liquid deglosser chemically dulls the surface to give paint a profile to bond to, and it avoids airborne dust entirely. That makes it the better choice for detailed trim, cornices, or occupied rooms where dust control matters. Always follow the product’s dwell and recoat times. For flat walls and patched repairs, though, physical sanding gives more consistent results.
Which sandpaper grit should you use for each job?
Grit number is the single most practical decision in the whole process. Go too coarse and you leave scratches that show through paint; too fine and you barely touch a glossy surface.
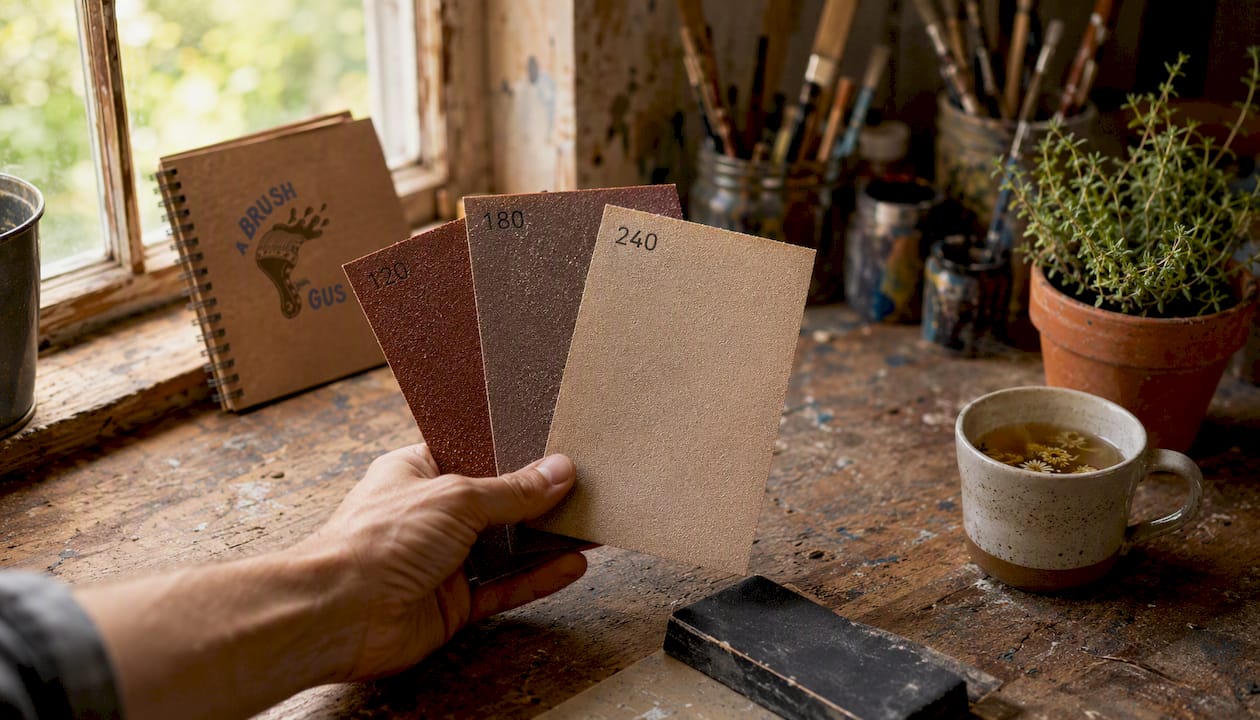
Norton Abrasives recommends the following ranges for wall preparation:
Task | Grit range | Notes |
Heavy smoothing, levelling filled repairs | 120–150 | Removes high spots; follow with finer grit |
Scuffing glossy/semi-gloss paint | 180–240 | Dulls sheen without deep scratches |
Finishing and blending filler edges | 180–240 | Feather out to surrounding wall |
Between coats of emulsion or gloss | 240–400 | Light pass only; removes nibs and dust specks |
New plaster or bare drywall | 120–150 then 180 | Level any ridges, then refine |
For most DIY wall prep, you will use two grits in sequence: start with 120–150 to level the repair or knock back the gloss, then move to 180–240 to refine the surface and remove the coarser scratches. A light pass with 220 grit between coats knocks down raised nibs and dust specks for a noticeably smoother finish.
Pro Tip: Always finish with the finest grit in your sequence. If you started at 120, finish at 240. Coarse scratches left by the first grit will telegraph through your topcoat, especially under raking light or with a sheen finish.
What tools and supplies do you need in the UK?
You do not need much, but the right tools make a real difference to both the result and the effort involved.
The essentials:
Sanding block (cork or rubber) — keeps pressure flat and prevents finger-shaped grooves
Assorted sandpaper sheets or rolls in 120, 180, and 240 grit
Sanding sponges for curved surfaces, window reveals, and corners
Pole sander fitted with a sanding pad for ceilings and large wall fields — it maintains even pressure and saves your arms
Vacuum with a brush attachment for dust removal
Tack cloths for the final wipe before priming
Sugar soap for washing walls before you start
Worth having for bigger jobs:
Random-orbit sander with dust-extraction bag for heavily textured or large surfaces
Plastic sheeting to seal doorways and contain dust
Liquid deglosser for detailed trim where sanding is fiddly
Most of these are available at B&Q, Screwfix, or Toolstation. For a one-off project, a sanding block, a few sheets of sandpaper, and a pole sander head (under £15 at most DIY stores) will cover the majority of domestic walls. A random-orbit sander is worth hiring rather than buying if you only need it once.
A note on dust extraction: Professional decorators bring dedicated extraction equipment that captures fine dust at source, before it settles on surfaces, furniture, and in the air. For large or heavily textured jobs, that level of control is difficult to replicate with a domestic vacuum alone — and it matters for both finish quality and air quality in the home.
How to sand a wall for painting: step by step
Work through this sequence and you will not miss anything critical.
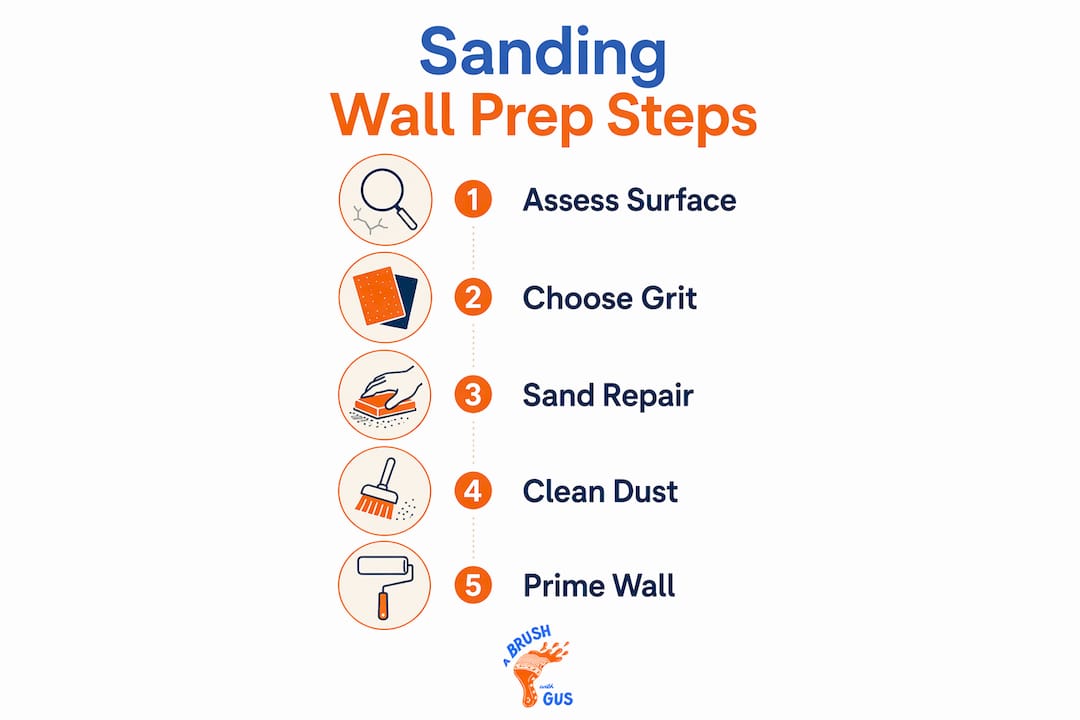
Clear and protect the room. Move furniture out or to the centre and cover it with dust sheets. Lay drop cloths on the floor. Mask skirting boards and window frames with low-tack tape.
Put on your PPE. FFP2 or FFP3 respirator, safety goggles, and old clothing before you touch the wall. Fine plaster and paint dust are hazardous to breathe.
Clean the walls. Wash with sugar soap where the surface is greasy, marked, or dusty. Rinse and allow to dry fully. Sanding a dirty wall grinds grime into the surface rather than smoothing it.
Fill holes and cracks. Use a suitable interior filler, press it slightly proud of the surface, and let it cure completely. Rushing this step is one of the most common DIY mistakes.
Sand filled repairs. Start with 120–150 grit on a sanding block to level the patch flush with the surrounding wall. Work in circular strokes, then long passes. Check under a torch held at a low angle to spot any remaining ridges.
Feather the edges. Blend the filler boundary into the surrounding wall using 180–240 grit. The transition should be a gradual slope, not a sharp ridge. Inspect under side light; a visible halo means you need to feather further.
Scuff-sand the whole field (if required). On glossy or semi-gloss walls, use 180–240 grit across the entire surface to dull the sheen. A pole sander keeps pressure consistent on large areas.
Final fine pass. Run 240 grit lightly over the whole area to remove any coarse scratches from earlier grits.
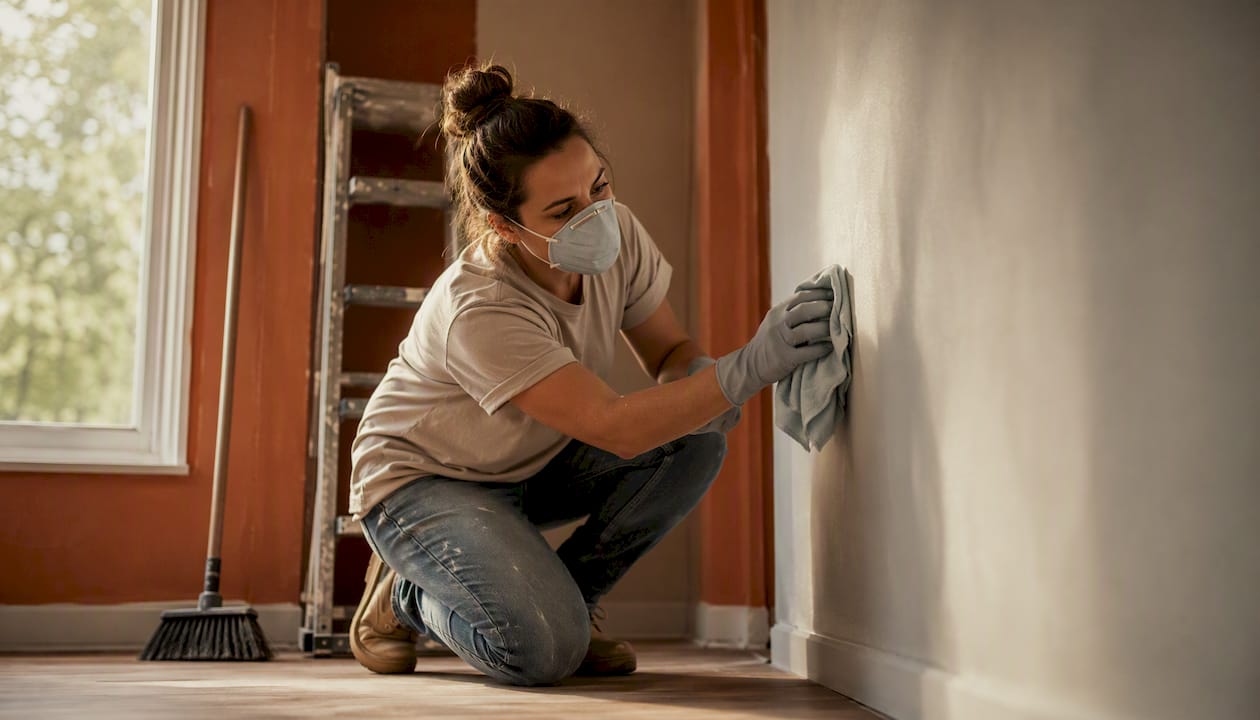
Vacuum, then tack. Vacuum all surfaces with a brush attachment first, then wipe with a tack cloth or barely damp microfibre cloth. Always vacuum before you tack — vacuuming after tacking re-suspends the dust you just collected.
Prime bare and patched areas. Apply a spot primer to any bare plaster or filler before your topcoat. See the primer types guide for which product suits your surface.
Pro Tip: Apply light, even pressure throughout. Let the abrasive do the work rather than pressing hard. On filler repairs especially, heavy pressure creates a dish-shaped depression that is almost impossible to hide under paint.
Dust control, cleaning and priming after sanding
Sanding dust is the most overlooked cause of a poor finish. Tiny particles left on the wall create a gritty texture, prevent primer from bonding properly, and can cause fisheyes or uneven sheen in the topcoat. Dulux guidance is clear: remove all dust by vacuuming and tack cloth before priming or painting.
The correct sequence is: vacuum with a brush attachment first, then wipe with a tack cloth or a barely damp microfibre cloth. Let the surface dry fully before priming, allowing sufficient drying time depending on room ventilation and temperature…
Skipping dust removal is the most common reason a freshly painted wall feels rough or gritty. Vacuum, then tack, then prime — in that order, every time.
Always prime bare plaster and patched filler spots before your topcoat. Bare areas absorb paint at a different rate to the surrounding wall, which causes uneven sheen and patchy colour. A spot primer seals those areas so the topcoat lays uniformly. For guidance on choosing the right product, the paint primers guide covers the main options.
Pro Tip: Run your hand lightly over the primed surface once it is dry. If it feels rough, give it a very light pass with 240 grit before your topcoat. That final scuff takes two minutes and makes a visible difference to the finished sheen.
Common sanding problems and how to fix them
Gouging or dishing the filler. Too much pressure on a sanding block creates a concave depression around the repair. Fill the dish, let it cure, and re-sand with lighter pressure. Use a rigid block rather than folded paper — it distributes force more evenly.
Visible halo around a patched area. The filler edge was not feathered far enough into the surrounding wall. Re-sand with 180–240 grit, extending the blend zone outward by several centimetres. Check under a torch at a low angle before priming.
Paint peeling after recoating. Poor preparation is the main reason paint fails: skipping sanding on glossy areas, inadequate dust removal, or poor feathering of patches. If peeling appears after painting, strip the affected area back to a sound surface, re-sand, prime, and recoat. For more on why paint fails on exterior surfaces, the causes of paint peeling guide explains the underlying mechanics.
Visible scratches after sanding mean the grit was too coarse for the final pass. Stop, switch to a finer grit (240 or above), and work the area again. Always inspect under raking light before priming — scratches that are invisible under overhead lighting will show clearly once the topcoat is on.
Warning: never sand wet or partially cured filler. It smears rather than cuts, clogs the paper immediately, and leaves a surface that will not accept paint evenly. Wait until the filler is completely hard and has lost any darker, damp colour before sanding.
Safety: masks, ventilation and dust control
Fine plaster and paint dust are genuinely hazardous. Prolonged exposure to fine particulates can cause respiratory irritation, and older paint may contain lead if the property predates the 1990s.
PPE checklist:
Respirator: FFP2 minimum for general sanding dust; FFP3 for fine plaster dust or any suspected lead paint. A basic dust mask (paper fold-flat) is not sufficient for fine particles
Eye protection: safety goggles or close-fitting glasses to keep dust out
Clothing: old clothing or disposable overalls; dust gets everywhere
Gloves: wear nitrile or rubber gloves when using liquid deglossers, which can irritate skin
Ventilation steps:
Open windows in the room you are working in and in adjacent rooms to create airflow
Use a fan positioned to direct dust-laden air towards an open window, not back into the room
Seal doorways with plastic sheeting to stop dust migrating through the house
Vacuum surfaces and floors promptly after sanding; do not let dust settle and dry out before cleaning
For suspected lead paint (common in homes built before the 1990s), stop and seek specialist advice before sanding. The Health and Safety Executive (HSE) publishes guidance on lead paint in domestic settings.
When does it make sense to call a professional?
Some jobs are genuinely better left to a professional decorator, and knowing which is which saves time, money, and frustration.
Consider hiring a pro when:
The area is large (whole rooms or multiple walls) and you lack the time or equipment
There is extensive flaking or peeling that requires thorough stripping and feathering
The property is occupied and dust control is critical — children, pets, or anyone with respiratory conditions
You are dealing with complex texture removal or heavily layered old paint
You want a spray or airless finish, which requires a higher standard of surface preparation
What a professional brings is not just speed. Specialist dust-extraction sanding captures fine particles at source, before they settle. Consistent feathering of repairs is a skill that takes practice to get right. Full priming and high-quality finishing are part of a joined-up process, not separate steps bolted on at the end.
Abrushwithgus is a family-operated business run by brothers Gus and Rhys, offering friendly, reliable and affordable painting and decorating services across Cornwall and the South West.
Pro Tip: If you are unsure whether a surface needs professional attention, hold a torch at a low angle to the wall in a darkened room. Every ridge, halo, and scratch will show up clearly. If what you see looks beyond a quick sand and prime, it probably is.
Key takeaways
Sanding filled repairs and scuffing glossy surfaces before painting is the single most effective step you can take to prevent peeling, patchy sheen, and premature paint failure.
Point | Details |
Always sand filled repairs | Use medium grit sandpaper to level filled repairs, then finer grit to feather edges flush with the surrounding wall. |
Scuff glossy surfaces | 180–240 grit dulls the sheen so new paint can grip; a liquid deglosser works on detailed trim. |
Clean before you sand | Wash with sugar soap first; sanding a dirty wall grinds grime in rather than removing it. |
Vacuum then tack, then prime | Remove all dust before priming bare or patched areas to prevent a gritty finish and uneven suction. |
Abrushwithgus for larger jobs | The team handles sanding, dust extraction, priming, and full decoration across Cornwall and the South West. |
The part most guides skip
There is a tendency in DIY advice to treat sanding as a single step you either do or skip. In practice, it is a sequence of decisions: which grit, how much pressure, how far to feather, when to stop. The most common mistake is not skipping sanding entirely — it is sanding with the wrong grit or stopping too soon, then priming over a surface that still has coarse scratches or an unfeathered repair edge.
The other thing worth saying plainly: the quality of your preparation determines the quality of your finish, full stop. A premium paint applied over poor prep will look worse than a mid-range paint applied over a properly sanded, primed surface. Time spent on the wall before you open the tin is never wasted.
Not keen on the sanding yourself?
The preparation work — cleaning, filling, sanding, and priming — takes longer than the painting itself on most domestic jobs. If you would rather hand that off, Abrushwithgus handles the full process: dust-controlled sanding, rapid feathering of repairs, and thorough priming before any paint goes on.

The team offers domestic painting and decorating across Cornwall and the South West, including interior preparation, spray finishing for smooth, even results, and UPVC spraying for windows and doors. Whether it is a single room or a full repaint, Gus and Rhys bring the equipment and experience to get the prep right first time.
Get in touch for a no-obligation quote at abrushwithgus.com.
Further reading and useful UK references
These are the most practical sources used in this guide, worth bookmarking for deeper reading:
Dulux — Preparation and tools: Manufacturer guidance on why sanding creates a key, when to prime, and how to clean before painting. The most authoritative UK-facing source for adhesion mechanics.
Norton Abrasives — Choosing the right sandpaper: The source for the grit ranges in this guide (120–150, 180–240, 240–400). Practical and specific.
Rawlins Paints — What grit sandpaper for painting?: Good detail on between-coat sanding and finishing grits, with trade-focused context.
Family Handyman — What is liquid sandpaper?: Clear explanation of chemical deglossers as a dust-free alternative for trim and occupied spaces.
PaintPricing — How to sand walls before painting: Useful on pole sander technique and the professional dust-control workflow.
One Doors & Closets on door preparation: “Proper surface preparation — cleaning, sanding, and priming — is what separates a finish that lasts from one that chips within months.” For door and trim-specific prep steps, One Day Doors & Closets covers the process in practical detail.
Recommended
Comments